In this tutorial we will discuss about Power Query tool in Microsoft Excel. We will discuss about installation process and how to write queries and also, discuss few examples to understand the power and usage of Power Query tool.
In today’s competitive world, there is requirement to understand and interpret data for various jobs. Gone are the days when business was limited to a certain locality. Thus, today, people have to analyze data and understand customer behavior, supply chain and demand supply economics via various data sources.
If you are one of those people who work with data a lot, you can be anyone amongst Accountant, HR, Data Analyst, etc. Hence, power query can be your power tool.
Power Query is one of the advanced Excel skills that you need to learn and in this tutorial, you will be exploring power query in detail and will be learning to transform data with it.
Let us start with the introduction and as we move along this tutorial, you will slowly grab the idea around the tool.
What is Excel Power Query ?
Power Query is an Excel add-in that you can use for ETL. ETL stands for Extract, transform and load. That means, you can extract data from different sources, transform it, and then load it to the worksheet. You can say POWER QUERY is a data cleansing machine as it has all the options to transform the data. It is real-time and records all the steps that you perform.
Why Power Query (Benefits) is useful ?
If you have this question in your mind, here’s a perfect answer for you:
- Different Data Sources: You can load data into power query editor from different data sources, like, CSV, TXT, JSON, etc.
- Transform Data Easily: Normally you use formulas and pivot tables for data transformations but with POWER QUERY you can do a lot thing just with clicks.
- It’s Real-Time: Write a query for once and you can refresh it every time there is a change in data, and it will transform the new data which you have updated.
Let us understand this with an example:
Imagine you have 150 Excel files that have data from 150 cities and now your boss wants you to create a report with all the data from those 150 files. OKAY, if you decide to open each file manually and copy and paste data from those files and you need at least one hour for this.
But with the power query, you can do it in minutes.
Further in this tutorial, you will learn how to use Power Query with a lot of examples, but first, you need to understand its concept.
The ETL Concept in Power Query
To learn power query, you will need to understand the ETL Concept :
1. Get Data
Power query allows you to get data from different sources like web, CSV, text files, multiple workbooks from a folder, and a lot of other sources where we can store data.
2. Transform Data
After getting data in the power query you have a whole bunch of options that you can use to transform it and clean it. It creates queries for all the steps you perform (in a sequence one step after another).
3. Load Data
From the power query editor, you can load the transformed data to the worksheet, or you can directly create a pivot table or a pivot chart or create a data connection only.
How to install Power Query in Microsoft Excel ?
Below you can see how to install power query in the different versions of Microsoft Excel. This will cover installing of power query in Excel 2007, installing power query in excel 2010 and excel 2013, installing power query in excel 2016, installing power query in mac, installing power query in office 2019 and installing power query in office 365 as well.
Excel 2007
If you are using Excel 2007, We are sorry but PQ is not available for this version. So you need to upgrade to the latest version of Excel (Excel for Office 365, Excel 2019, Excel 2016, Excel 2013, Excel 2010).

Excel 2010 and Excel 2013
For 2010 and 2013 users, you need to install an add-in separately which you can download from this link and once you install it, you’ll get a new tab in the Excel ribbon, like below:

- First, download the add-in from here (Microsoft’s Official Website).
- Once you have downloaded the file, open it and follow the instructions.
- After that, you’ll automatically get the “Power Query” tab on your Excel ribbon.
If somehow that “POWER QUERY” tab doesn’t appear, there is no need to worry about it. You can add it using the COM Add-ins option.
- Go to File Tab ➜ Options ➜ Add-ins.

- In “Add-In” options, select “COM Add-ins” and click GO.
- After that, tick mark “Microsoft Power Query for Excel”.

- In the end, click OK.
Excel 2016, 2019, Office 365
If you are using Excel 2016, Excel 2019, or you have OFFICE 365 subscription, it’s already there on the Data tab of your Excel Application, as a group named “GET & TRANSFORM”.
![]()
Excel Mac
If you are using Excel in Mac I’m afraid that there is no power query add-in for it and you can only refresh an existing query but you can’t create a new one and or even edit a query (LINK).

Introduction to Power Query Editor
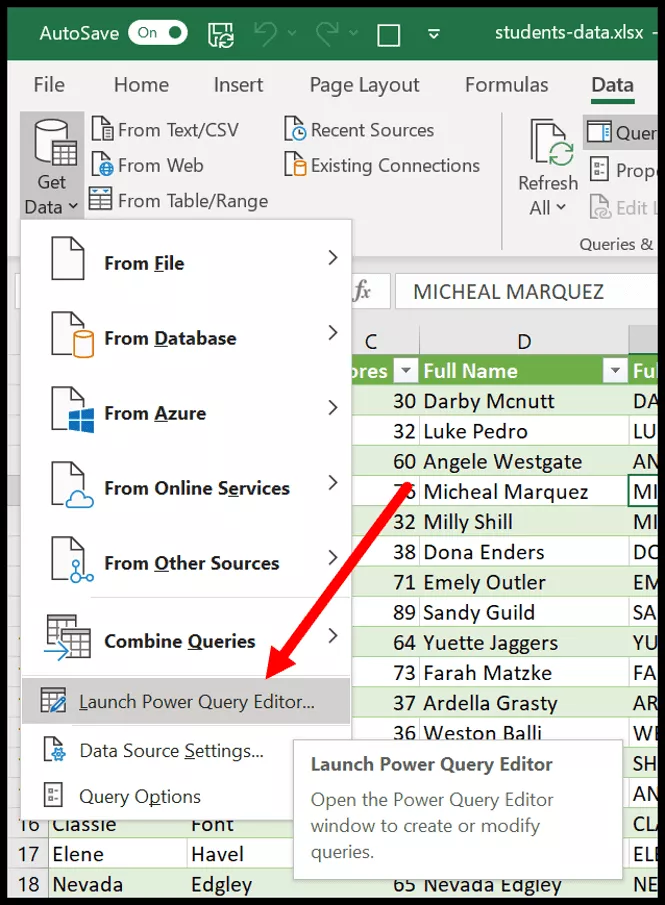
Power Query has its own editor where you can get the data, perform all the steps to create queries, and then load it to the worksheet. To open the power query editor, you need to go to the Data Tab and in the Get & Transform ➜ Get Data ➜ Launch Power Query Editor.
Below is the first look at the editor which you will get when you open it.

Now, let’s explore and understand each section in detail:
1. Ribbon
Let’s look at all the available tabs:
- File: From the file tab, you can load the data, discard the editor, and open the query settings.
- Home: In the HOME Tab, you have options to manage the loaded data, like, delete and move columns and rows.
- Transform: This tab has all the options which you need to transform and clean the data, like merge columns, transpose, etc.
- Add Column: Here you have the option to add new columns to the data you have in the power editor.
- View: From this tab, you can make changes to the view for the power query editor and data loaded.
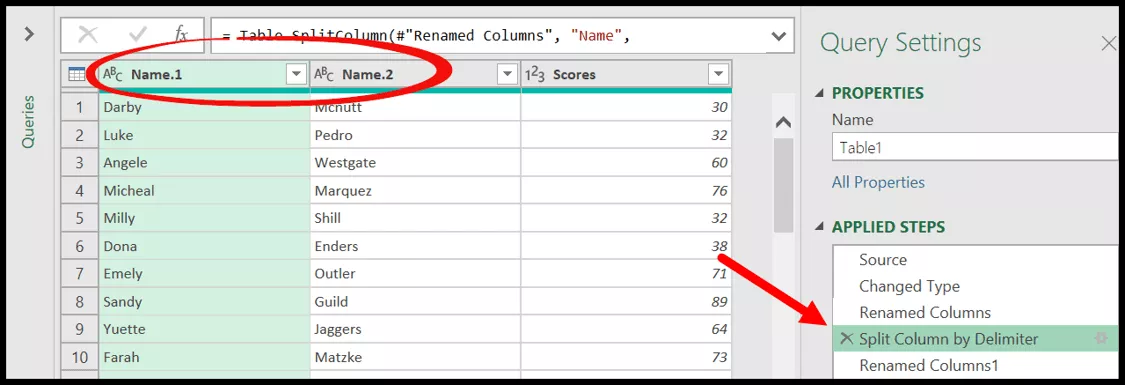
2. Applied Steps
On the right side of the editor, you have a query setting pane which includes the name of the query and all the applied steps in a sequence.
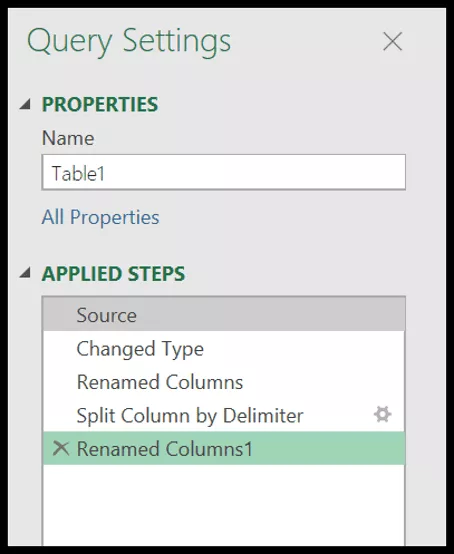
When you right-click on a step you have a list of options that you can perform, like, rename, delete, edit, move up or down, etc. and when you click on a step, the editor will take you to the transformation done on that step.

Look at the below where you have the total five steps applied and when I click on the 4th step it takes me to step four’s transformation where the columns name hasn’t changed.
3. Queries
The queries pane on the left side lists all the queries you have in the workbook right now. It’s basically one place where you can manage all the queries.

When you right-click on a query name you can see all the options that you can use (copy, delete, duplicate, etc.)
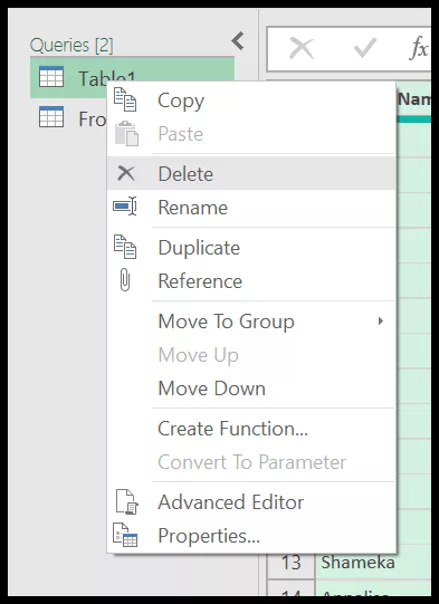
You can also create a new query by simply right click on the blank space on the queries pane and then select the option for the data source.
![]()
4. Formula Bar
As I said, whenever you apply a step in the editor it generates M code for that step, and you can see that code in the formula bar. You can simply click on the formula bar to edit the code.

Once you learn to use M code you can also create step by writing the code and simply clicking on the “FX” button to enter a custom step.

5. Data Preview
The data preview area looks like an Excel worksheet but there’s a little different than a normal worksheet where you can edit a cell or data directly. When you load data into the editor (we will do it in a while) it shows all the columns with the headers with the columns name and then rows with data.
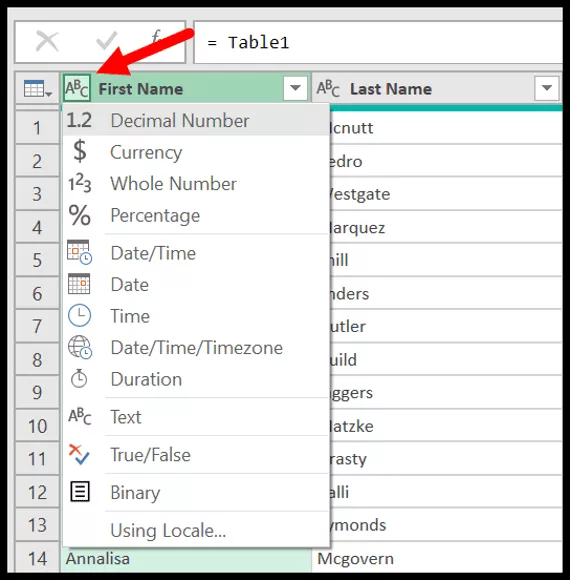
At the top of each column, you can see the data type of the data in the column. When you load data into the editor the power query applies the right data type (almost every time) to each column automatically.
You can click on the top left button on the column header to change the data type applied to the column. It has a list of all the data types from where you can.
And on the left side of the column header there you have the filter button which you can use to filter values from the column. Note: When you filter values from a column, the power query takes it as one step and lists it in the applied steps.

If you right-click on the header of the column you can see that there is a menu that includes a list of the options which you can use to transform the data and use any of the options and PQ stores it as a step in the applied steps.

What are data sources for Power Query in Microsoft Excel ?
The best part of the power query is you have the option to get data from multiple sources and transform that data and then load it into the worksheet.
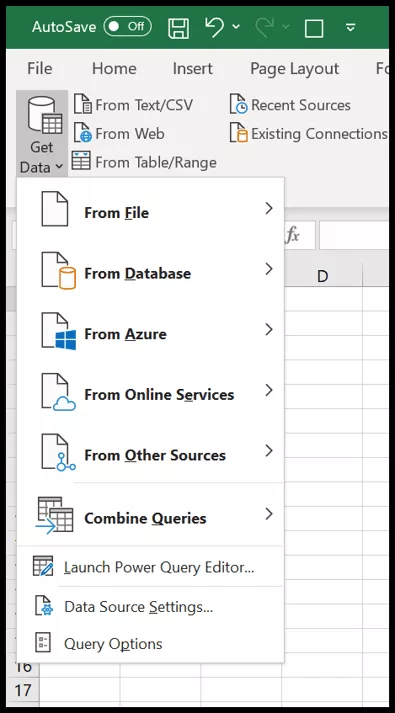
When you click on the Get Data in the GET & TRANSFORM you can see the complete list of data sources that you can get data load into the editor.
Now let’s look at some of the data sources:
- From Table/Range: With this option, you can load data into the power query editor directly from the active worksheet.
- From Workbook: From a different workbook that you have on your computer. You just need to locate that file using an open dialog box and it will get data from that file automatically.
- From Text/CSV: Get data from a text file or a comma-separated file and then you can load it into the worksheet.
- From Folder: It takes all the files from the folder and load data from them into the power query editor.
- From Web: With this option, you get data from a web address, imagine you have a File that is stored on the web or you have a web page from where you need to get the data.
How to Load Data into Power Query Editor in MS Excel ?
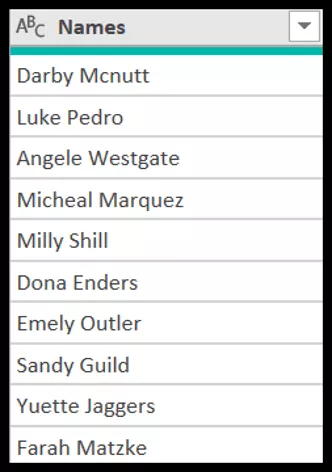
Now let’s learn to load data into the power query editor. Here you have a list of student names and their scores.
Download sample file > Download

You will be loading data directly from the worksheet, so you need to open the file first and then follow the below steps:
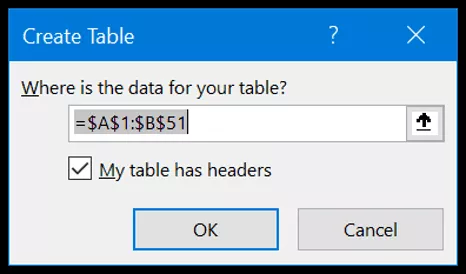
- First, apply an Excel table to the data (Even if you don’t do it Excel will do it for you before loading data into PQ editor).
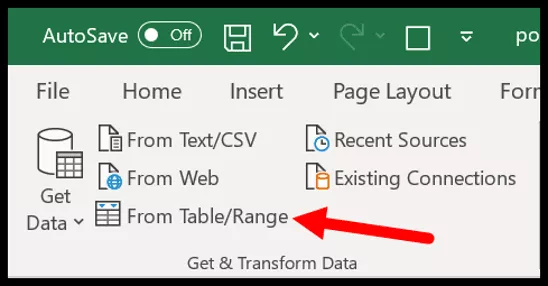
- Now, select a cell from the table and click on the “From Table/Range” (Data Tab Get & Transform).
- Once you click on the button, Excel confirms the range of data to apply an Excel table to it.
- At this point, you have the data into the power query editor, and it looks something like below.
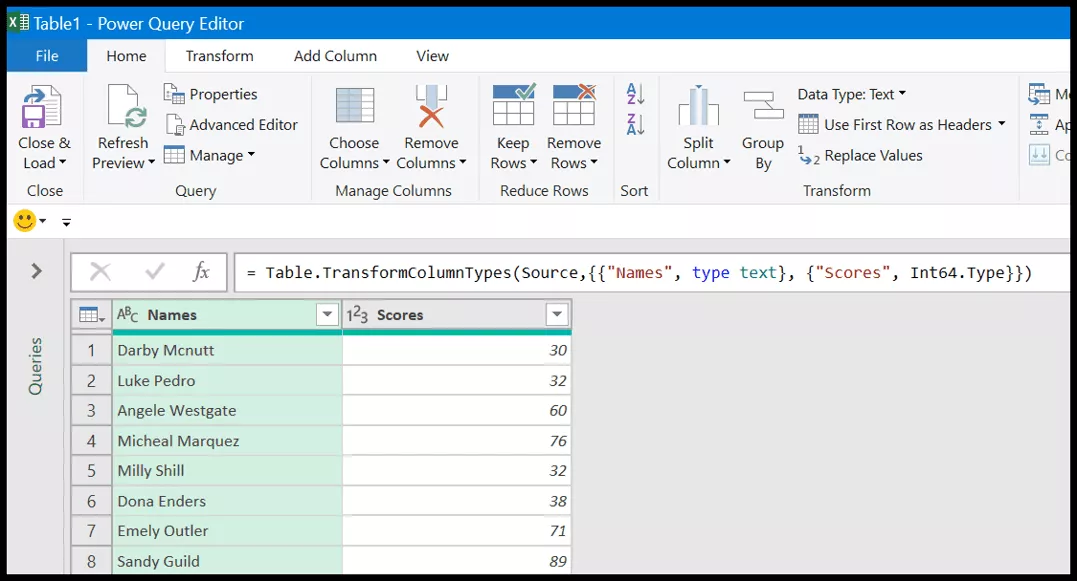
Here you can see:
- In the Formula bar, PQ has generated the M code for the table you have just loaded into the editor.
- On the left side of the editor, you have the queries pane where you have the list of the queries.
- On the right side, in the query settings, you have the section called “Applied Steps” where you have all the steps listed. Note: You must be thinking that you haven’t performed any “Changed Type” but there’s a step called “Changed Type” is there. When you load data into the editor it checks and applies the correct data types for all the columns automatically.

Examples of Power Query tool in MS Excel
Below is the list of examples of using Power Query tool in MS Excel, you can learn and master each examples –
- Replace values in Power Query
- Sort Data in Power Query
- Remove Columns in Power Query
- Split Columns in Power Query
- Rename Columns in Power Query
- Duplicate Columns in Power Query
- Transpose Columns or Row in Power Query
- Replace/ Remove Errors in Power Query
- Change Data Type in Power Query
- Change Case in Power Query
- Trim and Clean in Power Query
- Add Prefix and Suffix in Power Query
- Remove Negative Values in Power Query