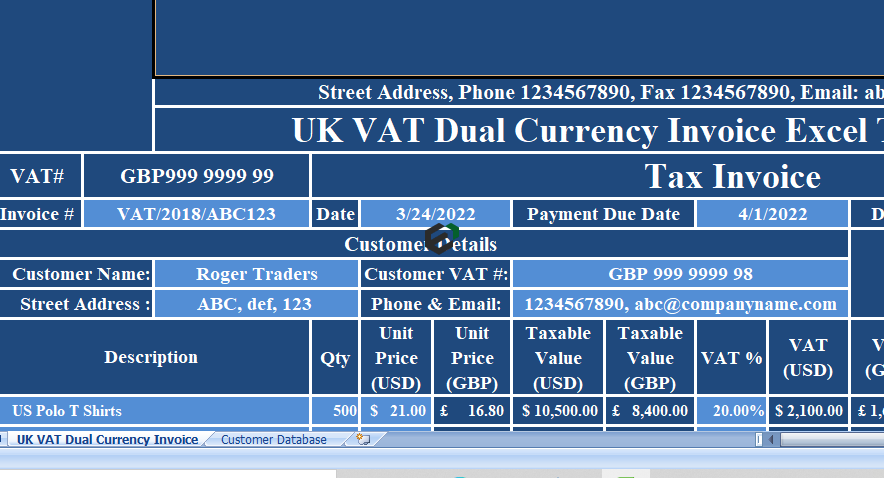
In this tutorial blog, we will learn to create, navigate, edit and delete data entry form in Microsoft Excel. Usually people use MS Access to create data entry form, but it might not be feasbile to learn completely new software for some specific need. Hence, let’s master the skill to create data entry form in Microsoft Excel and see what all features are available.
Introduction
Today, the data entry forms are one of the best ways to enter data into a table. But, to create a form with data entry feature is not an easy task. Hopefully, While struggling with this problem, we have found that you can create a form in Excel for data entry just with a single click.
The best part about this form is it’s pre-designed and flexible. Just look at the below example.

Quick Tip: To create this entry form, the only thing you need to do is to activate it.
How to open Data Entry Form in Microsoft Excel ?
In a short while, you will discover how helpful this tool is. But, this is hard to believe that there is no listing of this data entry form in the ribbon. So, you have to make it appear before we use it.
And before you activate this form, you need a table to enter data or at least headers of the data.

To activate the Data Entry Form feature in Microsoft Excel, click any of the cells in the table or just select one of the heading cells and use one of the below two methods.
- Use the keyboard shortcut key: Alt ⇢ D ⇢ O ⇢ O.
- Add an icon to the quick access toolbar.
- File ➜ Options ➜ Quick Access Toolbar.
- Choose Command From ➜ Commands Not In Ribbon ➜ From ➜ Add ➜ Click OK.
After using one of the above options, it will create a data entry form for you just like below.
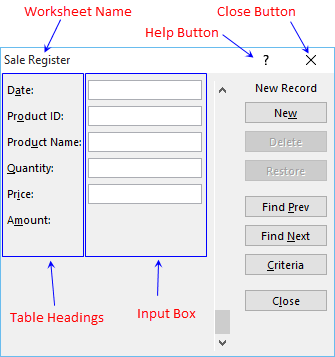
Have you noticed how all the headings of your data table are automatically captured in the form !
Create new entry in Data entry form
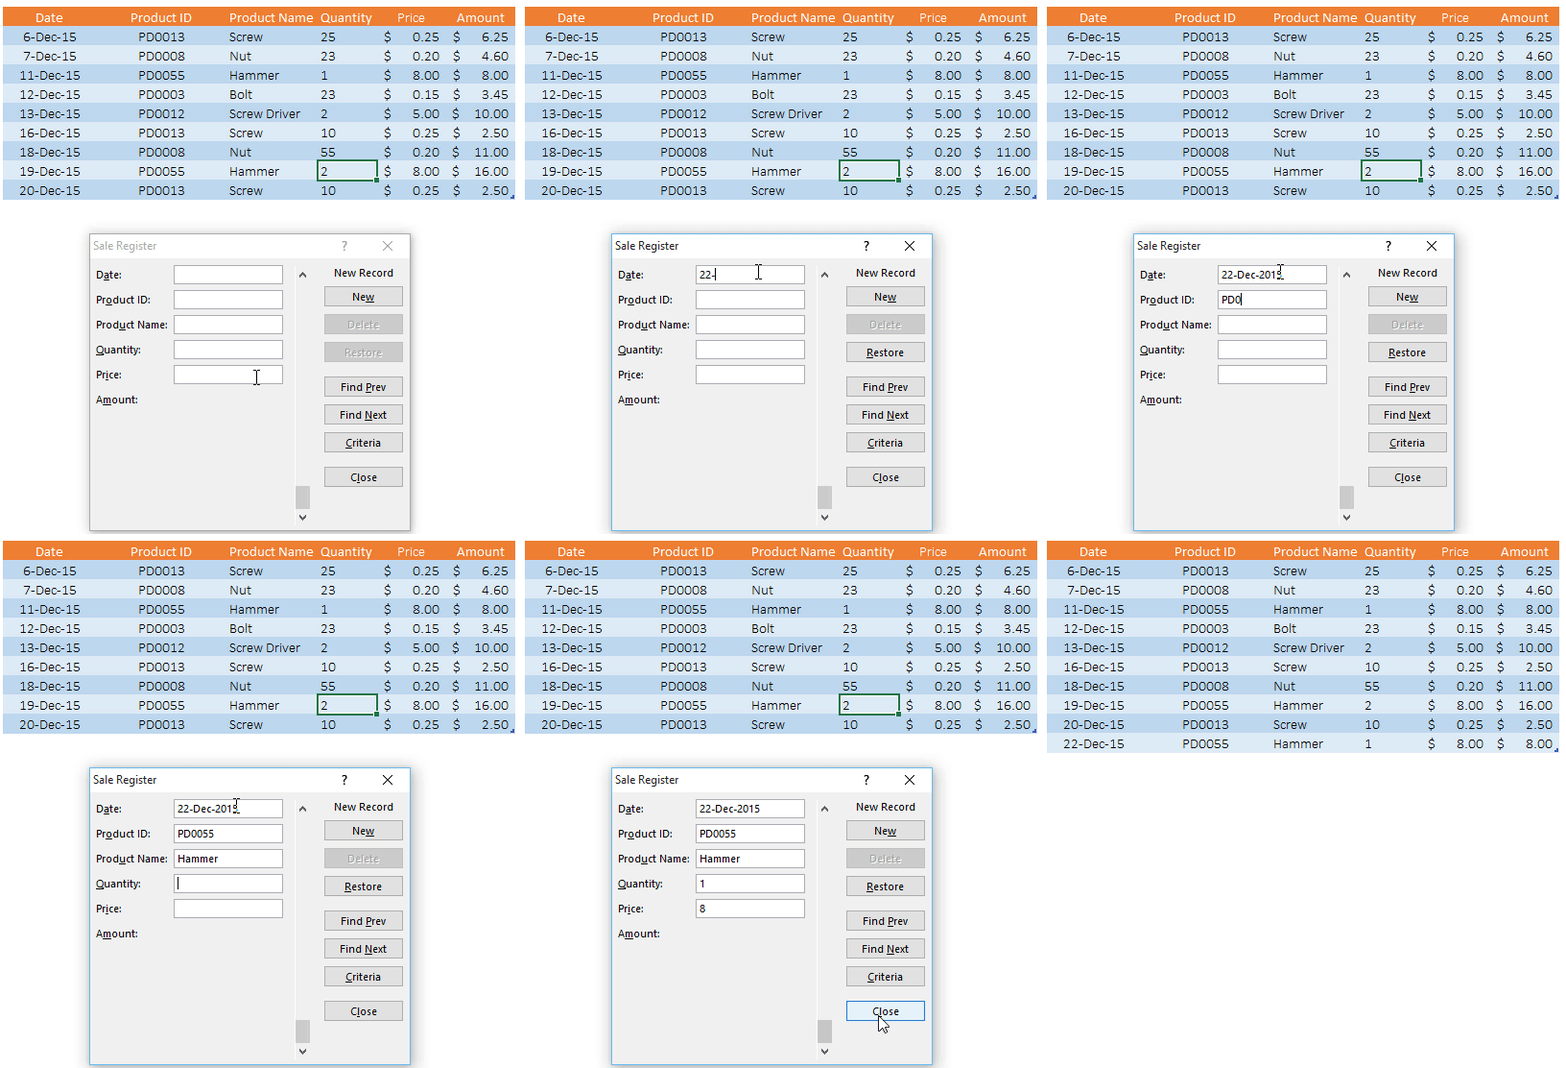
To create a new data entry fill all the input boxes with data and click on the “New” button. Now if you look at the below example you’ll find that there is no input bar for the amount column.
We have a formula in the amount column to multiply the quantity by the price. That means this form is quite smart to discover the columns where there is no need to input data. You can refer the image below to understand the full process in detail.
Navigating Entries in Data Entry Form
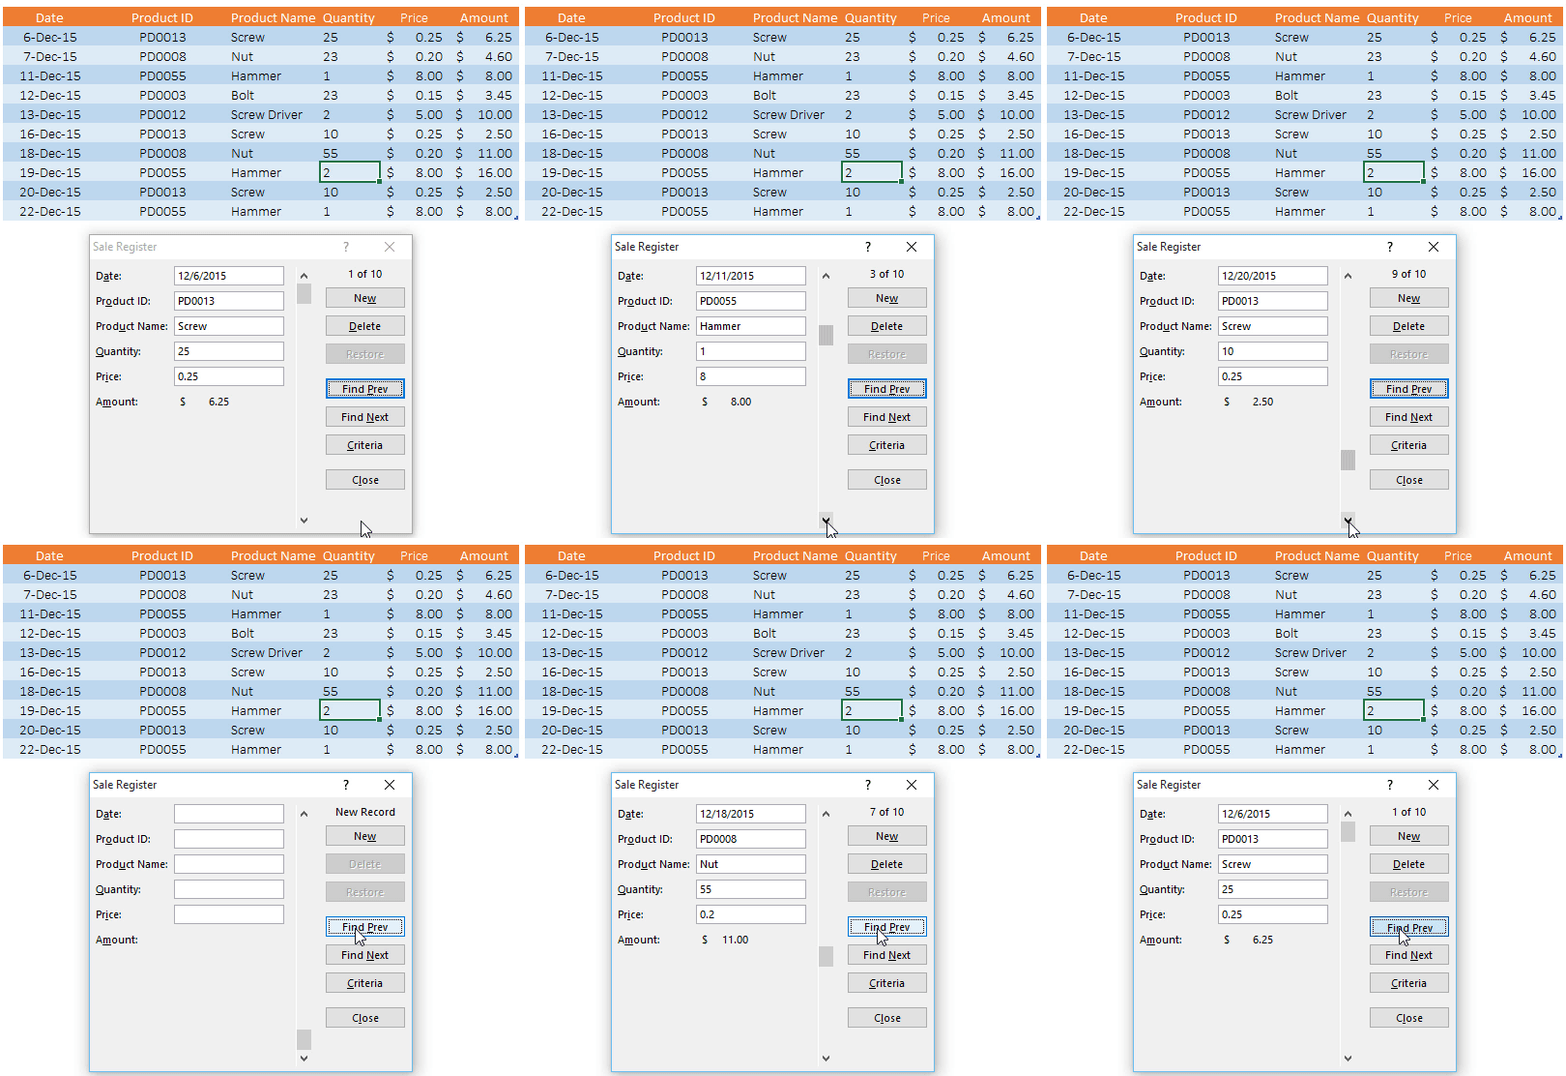
To navigate all the entries which you have entered in your data, you can use the scroll bar or you can use the “Find Prev” & “Find Next” buttons.
Editing Entries in Data Entry Form
To edit an entry you have to first navigate to that entry by the using method mentioned above. Once you navigate, you can make the changes in any of the input boxes and after that, just press enter key.

Deleting Entries in Data Entry Form
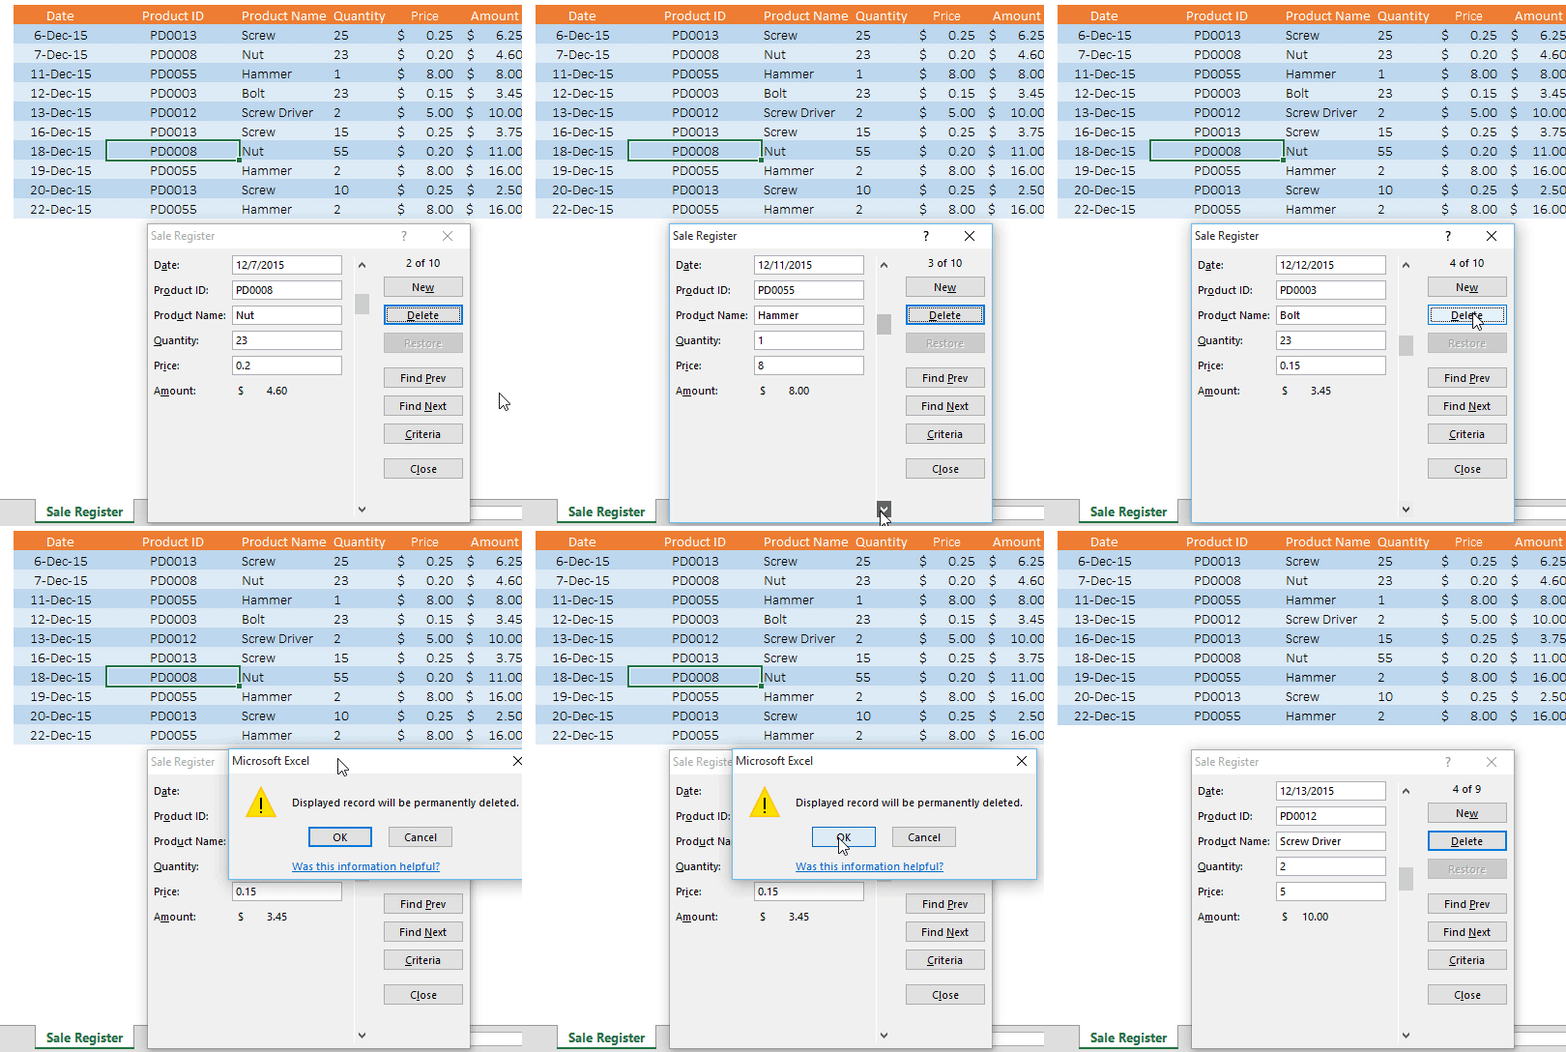
To delete an entry you have to navigate to that entry and click on the delete button. A pop window will appear for the confirmation of the deletion and it will instantly delete that entry from your data table.
Searching Specific Entry in Data Entry Form
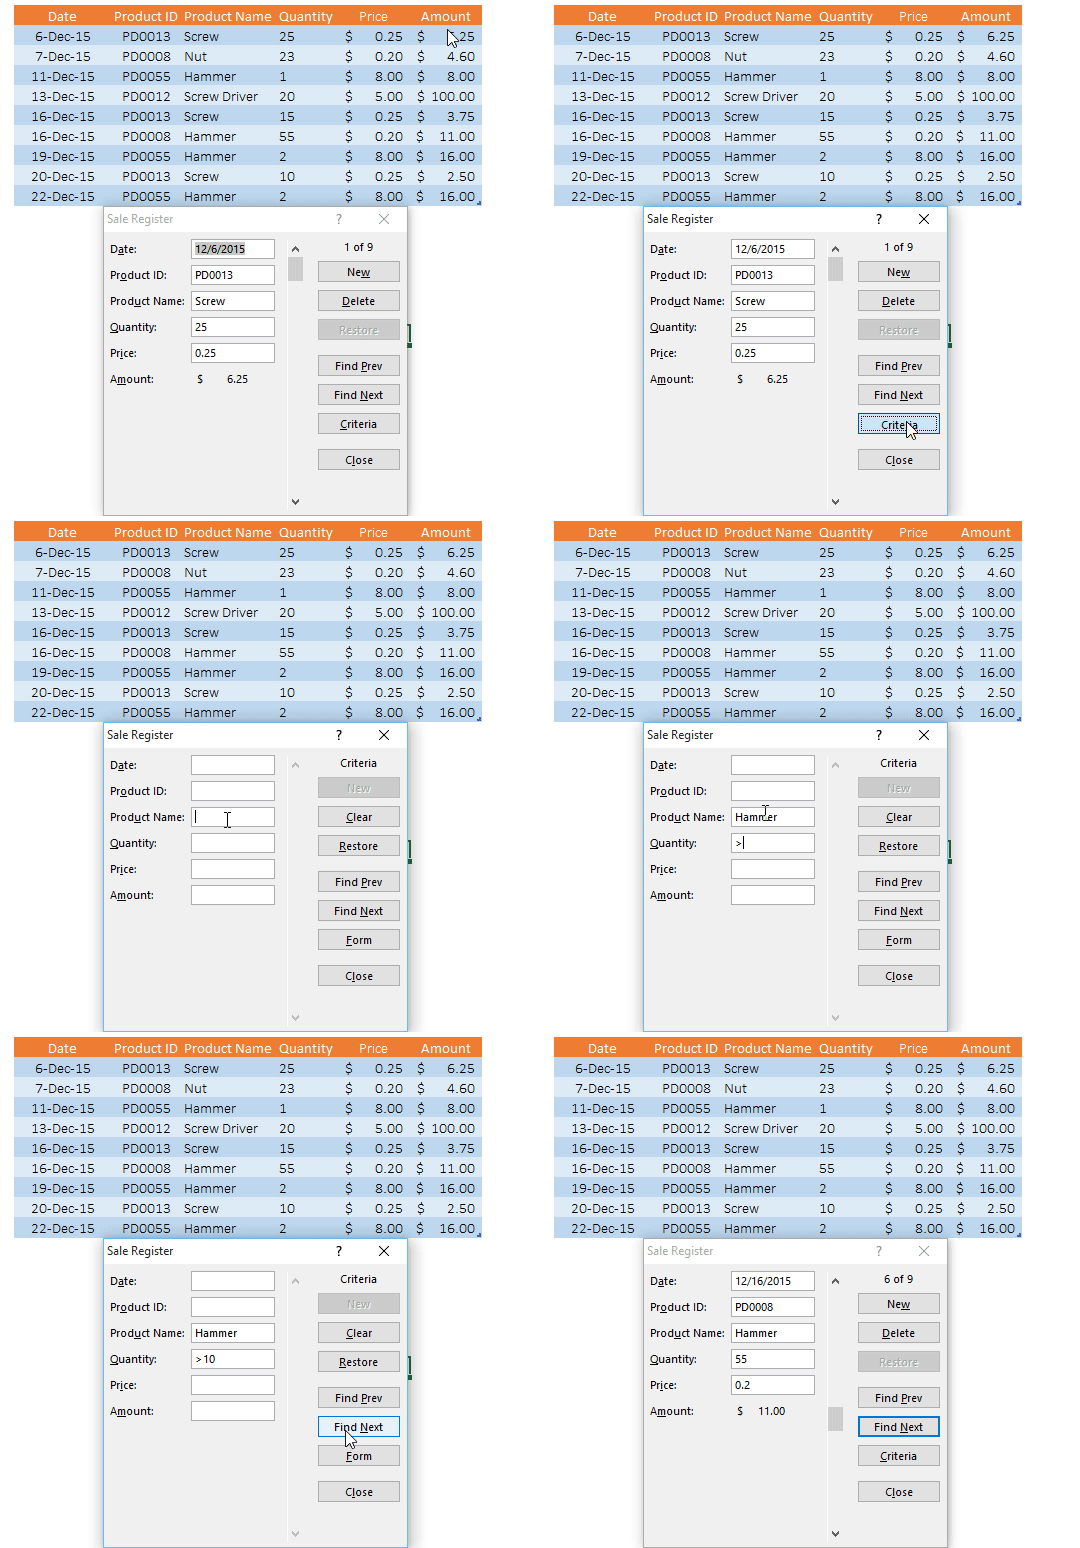
If you are working on large data, you can use the “Criteria” button to find a specific entry.
For example, if you want to find entries below the table that match some specific criteria, just click on the Criteria button, enter the criteria in the input box, and press Enter. You will get the data entries matching your criteria. You can also use your criteria in more than one input box.
Important Points about this Data Entry Form
Now, there are some important points that you should consider while using the data entry form feature in Microsoft Excel. Some of the pointers are;
-
- Maximum Input Boxes: You can utilize up to 32 input boxes in the data entry form.
- Input Box Width: The width of each input box correlates with the associated worksheet column. Should your columns lack adequate width to display values, the same width will reflect in the data form.
- Uniform Width Adjustment: If a single column exceeds its width, all input boxes within the data form will adopt that width.
- Named Range “Database”: Should you possess a range named “Database,” selecting a cell from the table becomes unnecessary. The form seamlessly inserts data into this designated table.
- Wildcard Functionality: When employing criteria to extract specific data, feel free to employ Excel Wildcard Characters within the form.
- Data Entry Precaution: Should you endeavor to overwrite data within a cell while generating data entries, expect an alert message, “Cannot extend list or database.”
Arming yourself with these insights will empower your interaction with the forms you create.
Conclusion
In conclusion, this tutorial has briefly walked you with valuable insights into creating, navigating, editing, and deleting data entry forms within Microsoft Excel. While MS Access is often favored for form creation, learning a new software might not be feasible for specific needs. Mastering the skill to craft data entry forms in Excel brings forth a host of features readily available for your use.
As highlighted, data entry forms provide a streamlined way to input data into tables, and the pre-designed, flexible nature of these forms ensures a user-friendly experience. Through a simple activation process, these forms are at your fingertips, enhancing your data entry efficiency.
Moreover, the inclusion of search criteria and specific entry retrieval tools adds another layer of functionality for working with extensive datasets. The points of consideration underscored in this tutorial, from input box limitations and width adjustments to leveraging named ranges and wildcard functionality, will undoubtedly enhance your proficiency in working with data entry forms.
Whether you’re a business professional, an analyst, or simply looking to streamline data management, this tutorial has empowered you to harness the capabilities of Microsoft Excel’s data entry forms to their fullest. Hope you enjoyed this tutorial blog !


