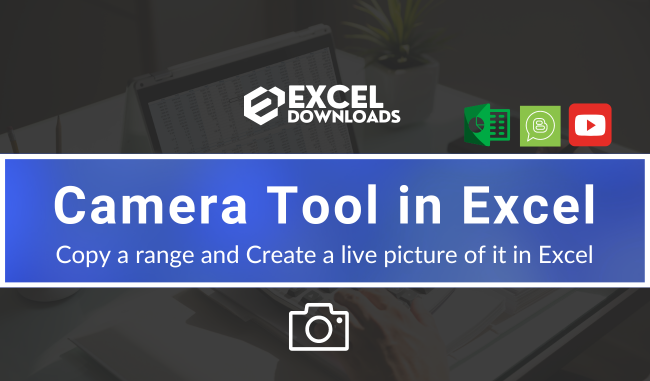
Welcome to another Advanced Excel Tutorials by ExcelDownloads.
Today we will discuss an interesting feature or tool in Excel, it is called “CAMERA TOOL“. Insteresting, right ?
What we will do is, first understand what is camera tool, how to enable it in your Excel application and finally how to use it. So, let’s begin with Introduction.
Introduction to Camera Tool in Excel
In a simple term, Excel’s Camera Tool can help you to create a live image of a cell or range of cells with a single click. Camera tool in Excel helps you to copy a range of cells and create a live picture or photo of it. You can paste that picture anywhere on your worksheet or any other applications like PowerPoint, Word etc. As this is a live picture if you make any changes to your original range that will reflect in the image as well (Works in Excel only).
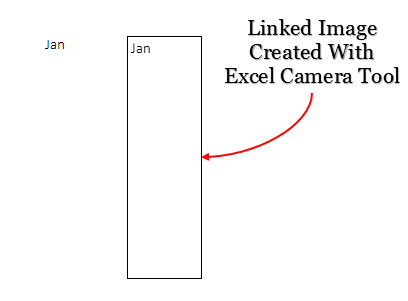
You can see the below GIF image to understand the final output. On the right hand side, it is an image linked with the range of cells. If any changes is done in the range, image content is updated automatically. Interesting, right ? Now, let’s see how to Enable Camera Tool.
Enable Camera Tool in Excel
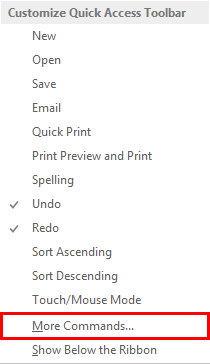
Initially, the Camera tool is not anywhere in the Excel ribbon thus, we need to add it to the quick access toolbar before we use it. Follow these simple steps given below to enable this tool in your system (Excel);
- From your quick access toolbar, click on the down arrow.

- You’ll get a drop-down menu. Click on more commands.
- Now, in Excel options select all commands from “Choose Commands From”. Select a camera from the list and add it to the quick access toolbar.

- Click OK.
- Now, you have a camera icon in the quick access toolbar.
![]()
Since we have enabled the Camera Tool, Let’s see how to use it and see few examples to understand the benefits of using this tool.
How to use Camera Tool in Excel ?
Camera tool is a creative tool in Excel. To use this tool, it requires some simple steps and pointers to follow;
- Select a range of cells from which you want to create a live image or picture.
- Click on the camera icon in your quick access toolbar (We have enabled in the earlier section of this tutorial blog).
- Your cursor will convert into a plus icon (Refer the images below).
- Now, click on the place in your worksheet where you want to insert your live picture.
Amazing, right ? Below are some of the examples of Camera Tool which will help you understand benefits of this tool;
Examples of Camera Tool in Excel
We will provide two examples, one towards graphs and charts and another being data tables. Both these examples will help you get the idea on how to use Camera Tool much more efficently.
Adding In-Cell Charts to Your Dashboard
Everyone is a huge fan of in-cell charts but the most difficult part of these charts is adding them to the dashboard. So, We can use a camera tool to create a live image to add them to the dashboards. Dashboards will look awesome ! Refer the GIF image below to understand the steps quickly.

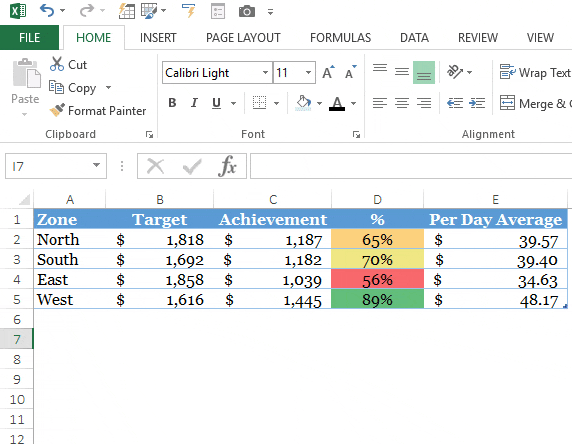
Adding Data Tables in a Dashboard
ou can also use it to insert live images of data tables. Sometimes data tables consume lots of space on our dashboard. We can add a live snapshot of data to our dashboards.
Conclusion
The most important point is when you change the location of an image from one worksheet to another it will change the link to the current worksheet. Besides this, This camera tool is excellent tool to enhance the quality of your dashboards, insights sizes etc. Just select a range, and click where you want to paste the image. Yes, that’s it. Hope you enjoyed this tutorial blogpost.