We often come across JSON File formats. For example, in GST Filing or regulatory filing – JSON file of GSTR 2 or similar return is seen. Now, converting JSON (JavaScript Object Notation) into Excel format can be important for several reasons, depending on the context and the needs of your project or organization.
JSON and Excel serve different purposes and have different characteristics, so converting between them can offer advantages in specific scenarios. Lets try to understand what is a JSON file and Excel Format;
Understanding JSON and Excel Files
JSON is a lightweight data-interchange format that is commonly used for structuring and transmitting data between a server and a client, or between different parts of a software application. It is human-readable, easy for machines to parse, and supports nested structures and arrays. JSON file is often used in web APIs, configuration files, and as a data storage format for applications and databases.
On the other hand, Excel (xls, xlsx, xlsxb) is a powerful spreadsheet software that is widely used for organizing, analyzing, and presenting tabular data. It provides features for data manipulation, visualization, and calculations. Excel files (usually in the .xlsx format) are commonly used for reporting, data analysis, budgeting, project management, and more.
Now in this tutorial blog, we will understand how you can load JSON file in Excel and save it for future use. Let’s begin, shall we ?
Import JSON File Into XLSX File
First step is to import the file in Excel Software.
To start parsing a JSON file, open Microsoft Excel on your computer and start a new spreadsheet.
On the spreadsheet window, in Excel’s ribbon at the top, click the “Data” tab.

On the “Data” tab, from the “Get & Transform Data” section, select Get Data > From File > From JSON.

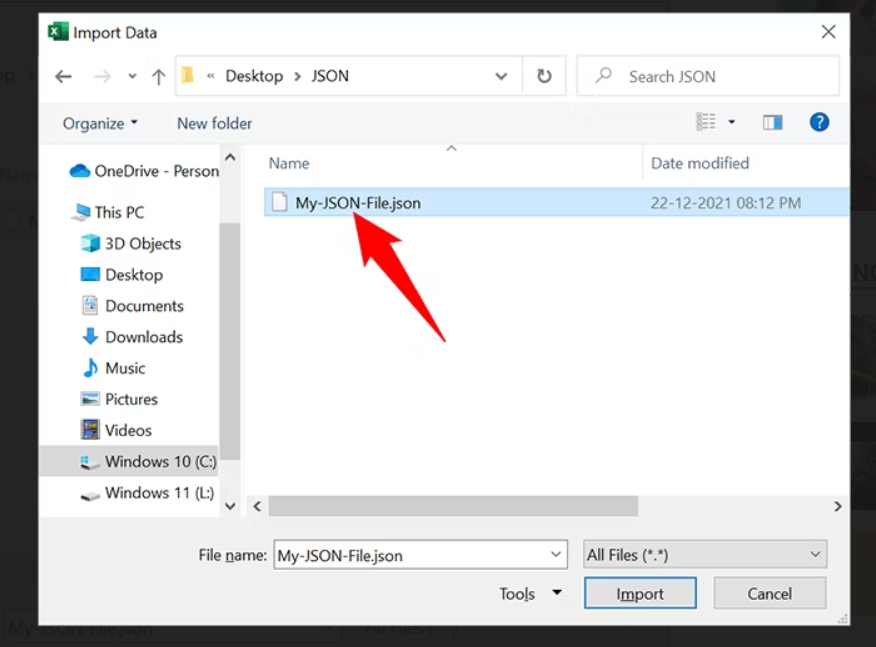
You will see your computer’s standard “Import” window. Here, open the folder where your JSON file is located. Double-click the file to connect it to Excel.
Excel will open a “Power Query Editor” window. Here, you will decide how JSON’s data will be loaded in your spreadsheet. First, at the top of the window, click the “To Table” option. This turns your data into a table.

In the “To Table” prompt, click “OK.”
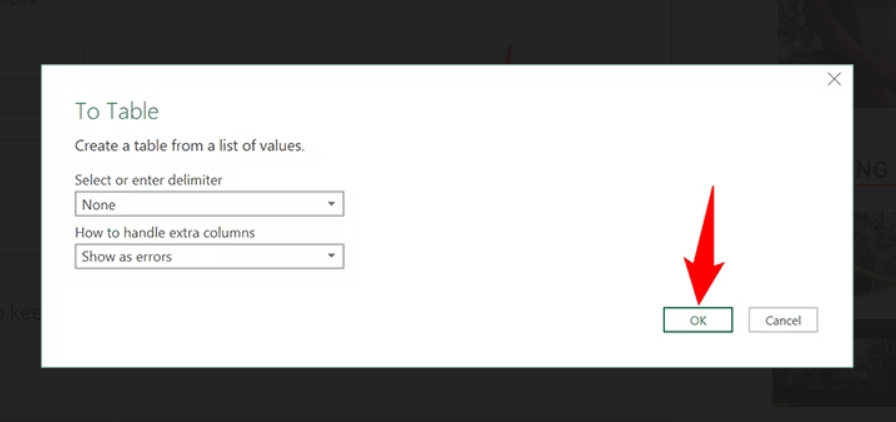
To choose which columns to keep in your spreadsheet, next to “Column1,” click the double-arrow icon.
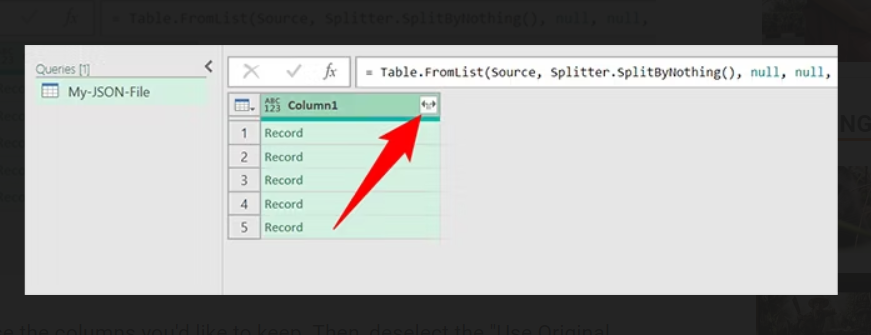
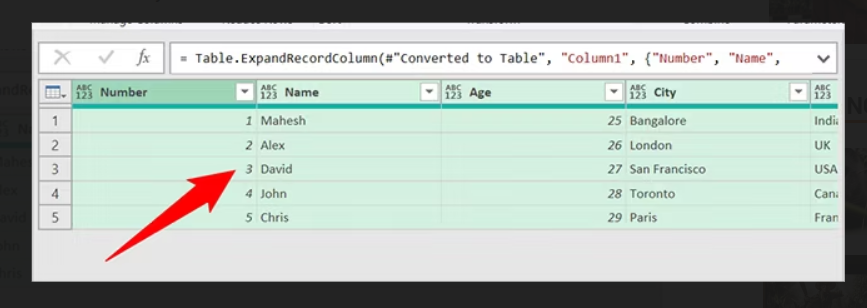
In the menu that opens, choose the columns you’d like to keep. Then, deselect the “Use Original Column Name as Prefix” option and click “OK.”

Your JSON file’s data is now visible in Excel-style columns and rows.
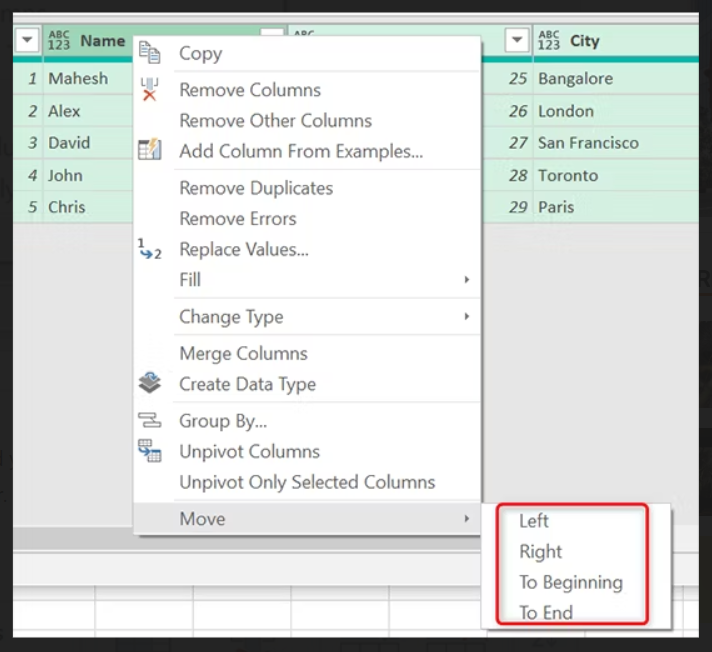
If you’d like to remove or change the positions of your columns, right-click a column and choose an appropriate option.
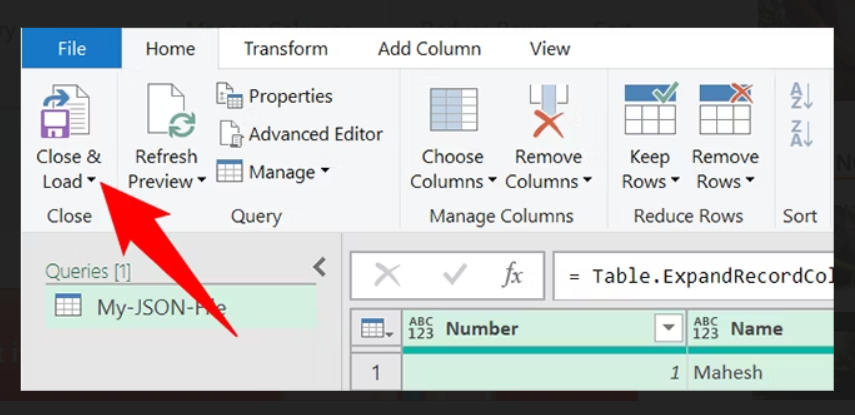
When you’re happy with the result, add your JSON data to your Excel spreadsheet by clicking “Close & Load” in the window’s top-left corner.
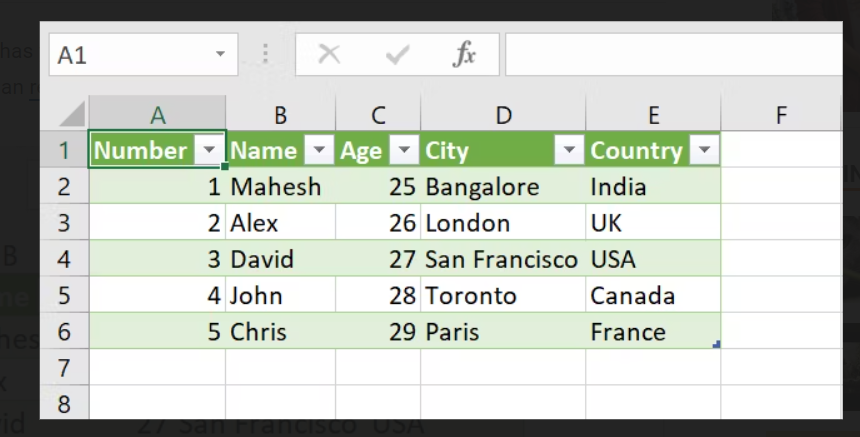
JSON file as Table in Excel
Your Excel spreadsheet now has your JSON data in it. You can play around with this data however you want. For instance, you can remove the table formatting or even convert the table to a range.
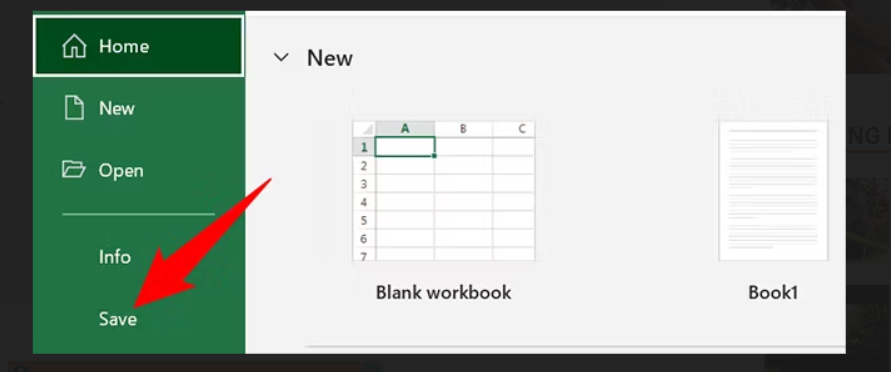
Finally, to save this JSON data in Excel format, click “File” in Excel’s top-left corner.

Saving JSON File as Excel File
In the left sidebar, click “Save.”
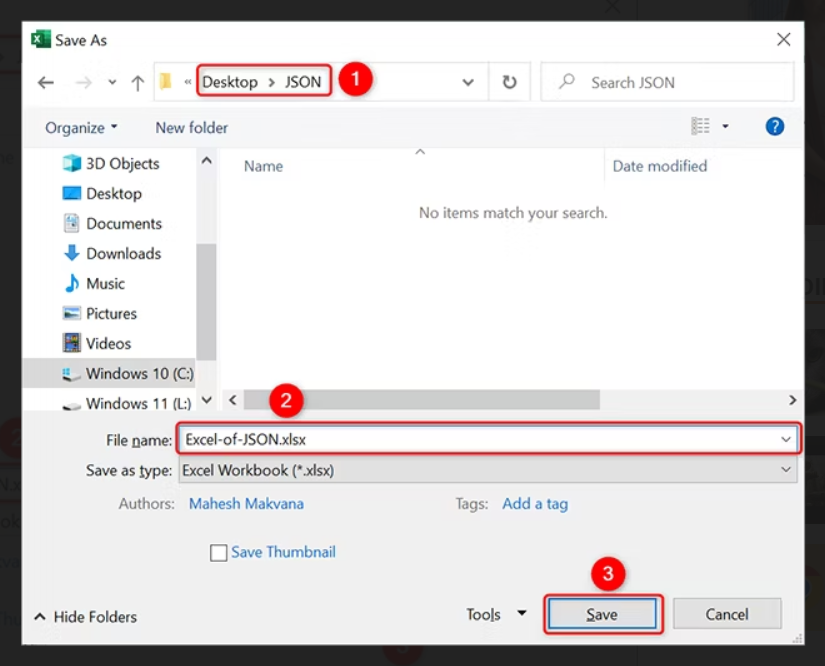
Your computer’s standard “save” window will open. Here, select a folder to save your file in, type a name for your file, and click “Save.”
Conclusion
In summary, converting JSON to Excel offers tailored benefits for diverse projects. JSON excels in data interchange, while Excel dominates data analysis and reporting. This guide outlines importing JSON into Excel via Power Query Editor, merging strengths for enhanced data utilization. Transition seamlessly between formats for optimized insights and reporting.


