Background
While working with a data set, to make our analytics and visualization more efficient, we might require merge and unmerge features in excel. When you merge cells in excel workbook/ worksheet, the data field becomes common and when you use the unmerge feature, the data field gets into separate fields.
This tutorial will teach you how to merge cells in excel also a slight intro on the unmerge features as well. We have tried our best to cover Windows, macOS and Web version of Excel so that the benefit of learning can be taken by everyone.
This tutorial is relevant for excel for windows, excel for mac and excel for web versions.
Merge and unmerge cells in Windows Excel
You can’t split an individual cell, but you can make it appear as if a cell has been split by merging the cells above it.
Merge cells
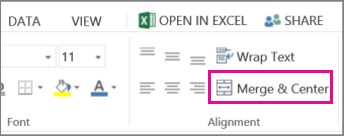
- Select the cells to merge.
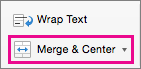
- Select Merge & Center.
Note – Merging cells can be challenging when there is data in both the fields. Please understand, when you merge multiple cells, the contents of only one cell i.e. the upper-left cell for left-to-right languages, or the upper-right cell for right-to-left languages appear in the merged cell.
The contents of the other cells that you merge are automatically deleted. So, be careful while merging cells in Excel.
Unmerge cells
- Select the Merge & Center down arrow.
- Select Unmerge Cells.
You cannot split an unmerged cell.
After merging cells, you can split a merged cell into separate cells again.
Merge and unmerge cells in MacOS Excel
Merging feature in excel combines two or more cells to create a new, larger cell. This is a great way to create a label that spans several columns. Helps in enhancing the visualization of the excel reports and dashboards. This section of the tutorial covers merge and unmerge functionality in macOS Excel version.
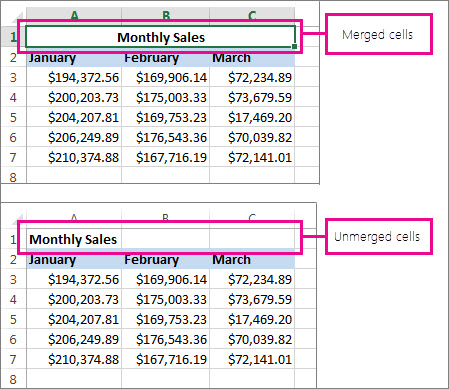
In the example here below, cells A1, B1, and C1 were merged to create the label “Monthly Sales” to describe the information in rows 2 through 7. This is basic introduction to how a merged cells in excel looks like. We will discuss the full step-by-step tutorial below –

Merge cells
Merge two or more cells by following these steps given below for Windows Excel of any version :
- Select two or more adjacent cells you want to merge.
Point to be careful with – Ensure that the data you want to retain is in the upper-left cell, and keep in mind that all data in the other merged cells will be deleted. To retain any data from those other cells, simply copy it to another place in the worksheet—before you merge.
- On the Home tab, select Merge & Center.
Points to be careful with –
- If Merge & Center is disabled, ensure that you’re not editing a cell—and the cells you want to merge aren’t formatted as an Excel table. Cells formatted as a table typically display alternating shaded rows, and perhaps filter arrows on the column headings.
- To merge cells without centering, click the arrow next to Merge and Center, and then click Merge Across or Merge Cells.
Unmerge cells
If you need to reverse a cell merge in MacOS Excel version, click onto the merged cell and then choose Unmerge Cells item in the Merge & Center menu (see the figure above).
Split text from one cell into multiple cells in macOS Excel
So, you can take the text in one or more cells, and distribute it to multiple cells. This is the opposite of concatenation, in which you combine text from two or more cells into one cell. This functionality is available for Windows Excel version as well.
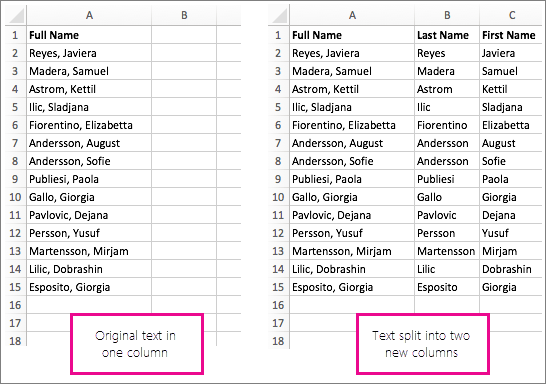
For example, see the screen below to understand better. You can split a column containing full names into separate First Name and Last Name columns. We will discuss the full tutorial below for this functionality –
Follow the steps below to split text into multiple columns:
- First, select the cell or column in your excel workbook that contains the text you want to split.
-
Point to be careful with – Select as many rows as you want, but no more than one column. Also, ensure that are sufficient empty columns to the right—so that none of your data is deleted. Simply add empty columns, if necessary. Use keyboard shortcuts in Excel if required.
- Now, Click Data >Text to Columns, which displays the Convert Text to Columns Wizard.
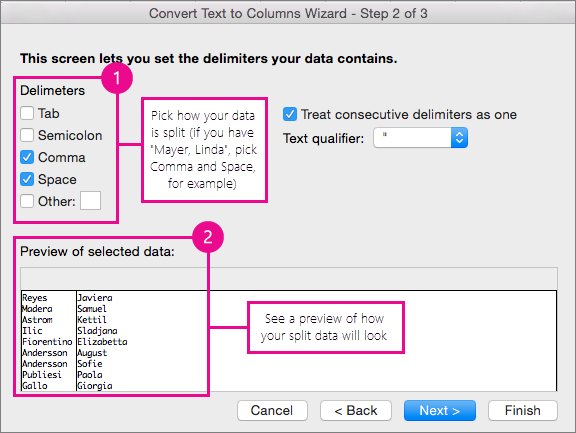
- Click Delimited > Next.
-
Check the Space box, and clear the rest of the boxes. Or, check both the Comma and Space boxes if that is how your text is split (such as “Reyes, Javiers”, with a comma and space between the names). A preview of the data appears in the panel at the bottom of the popup window.
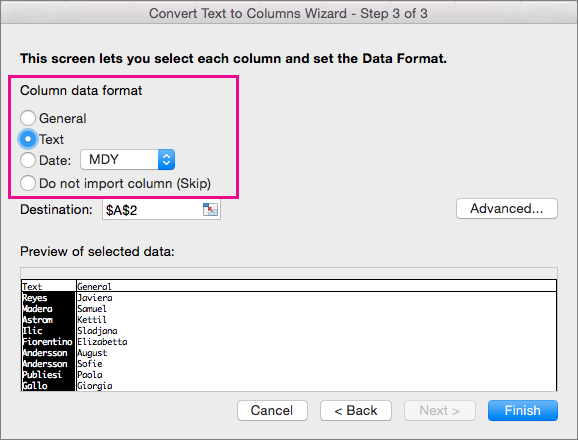
- Click Next and then choose the format for your new columns. If you don’t want the default format, choose a format such as Text, then click the second column of data in the Data preview window, and click the same format again. Repeat this for all of the columns in the preview window.
- Click the
 button to the right of the Destination box to collapse the popup window.
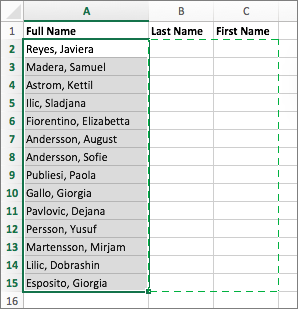
 - Anywhere in your workbook, select the cells that you want to contain the split data. For example, if you are dividing a full name into a first name column and a last name column, select the appropriate number of cells in two adjacent columns.
- Click the
 button to expand the popup window again, and then click the Finish button.
Merge and unmerge cells in Web Excel
Merging feature in Web Version of MS Excel combines two or more cells to create a new, larger cell. This is a great way to create a label that spans several columns.
For example, here cells A1, B1, and C1 were merged to create the label “Monthly Sales” to describe the information in rows 2 through 7.
Merge cells
- Click the first cell and press Shift while you click the last cell in the range you want to merge.
Point to be careful with – Make sure only one of the cells in the range has data.
- Click Home > Merge & Center.
If Merge & Center is dimmed, make sure you’re not editing a cell or the cells you want to merge aren’t inside a table.
Please remember – To merge cells without centering the data, click the merged cell and then click the left, center or right alignment options next to Merge & Center.
If you change your mind, you can always undo the merge by clicking the merged cell and clicking Merge & Center.
Unmerge cells
To unmerge cells immediately after merging them, press Ctrl + Z. Otherwise do this:
- Click the merged cell and click Home > Merge & Center.
The data in the merged cell moves to the left cell when the cells split.